Thunderbird 2: account setup
These instructions will help you set up Thunderbird 2 to use with your University email address.
NOTE
The screen shots in this document are for Windows XP. If you are using a different operating system, they will look slightly different, but the information will be the same.
Refer to these settings while you follow the instructions below.
IMAP Server Settings| Incoming | Outgoing | |
|---|---|---|
| Server Name | mail.udel.edu | mail.udel.edu |
| Port | 993 |
25 if you're on campus, OR 587 if you're off-campus |
| Connection security | SSL |
TLS, if available Uncheck Use name and password check box |
- If you see the Import Wizard window, choose Don't import anything. Click Next.
- Next, you will see the Account
Wizard window.
NOTE
If you don't see the Account Wizard window (i.e., if you've previously set up another account in Thunderbird), click the Tools menu, and then click Account Settings. Below the left panel, click Account Actions, and then click Add Mail Account to get to the Account Wizard window.
- Choose Email account, and then click Next.
- Enter your name and email address, and then click Next.
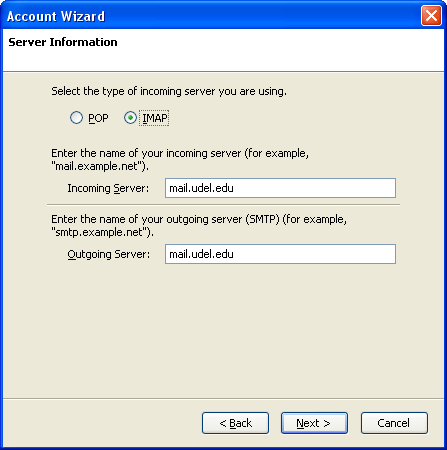
- Choose IMAP at the top of the
Server Information window. Then, type
the information from the Incoming
Server Name and Outgoing Server Name in
the table above.

Click Next. - In the Incoming User Name field, type your UDelNet ID (i.e., what comes before @udel.edu in your email address). Click Next.
- In the Account Name field, type a name for your account, or use the default name. Click Next.
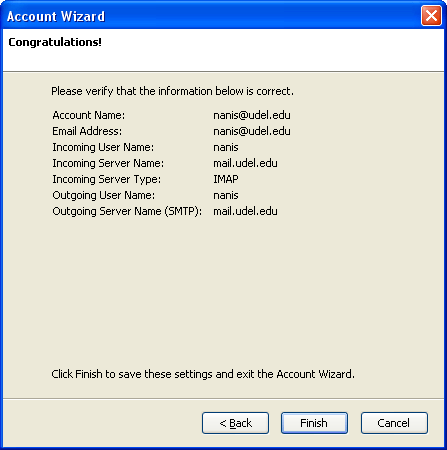
- You should see a Congratulations!
window that looks similar to the
following:

Click Finish. - If you see a prompt box that asks for your password, type your UD Password in the blank field. Do not check Use Password Manager to remember this password unless you are the only one using your computer. Click OK.
- From the Tools menu, click Account
Settings.
- Click your UD email address on the left panel if it's not already selected.
- Optional: In the Organization field, type University of Delaware.
- Click Server Settings in the left
panel under your UD email address.
Follow these recommended settings, or
change them as you see necessary.
- From the When I delete a message drop-down list, choose Mark it as deleted (recommended).
- Check Clean up ("Expunge") Inbox on Exit (recommended).
- Check Empty Trash on Exit (recommended).
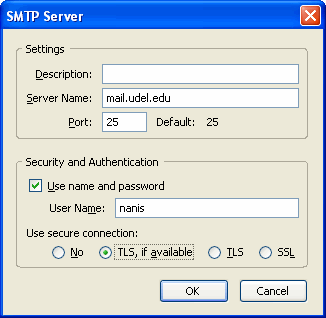
- Click Outgoing Server (SMTP) in the
left panel, and then click Edit. Change
the settings to match the Outgoing
column in the table above. Check the
Use name and password check box, and
enter your UDelNet ID in the User Name
field if it doesn't appear
automatically. Your screen should look
similar to the following:

NOTE
If you are connecting to the Internet off-campus and have difficulty sending mail, change the port number to 587. Then, uncheck the Use name and password check box.
- Click OK.
- Click OK again.

