|
If
you have data on the hard drive of your computer that you want to back
up to a CD, you can use
the Windows Backup utility to do so. This utility
comes with Windows 98, 2000, and XP computers. However, you must format
the CD before you can use the Backup utility.
How
to use the Windows Backup Utility
- If
you have not already done so, format the
CD you will use.
- Click Start in
the lower-left corner of the computer's desktop .
- Click All
Programs | Accessories | System
Tools | Backup.
You
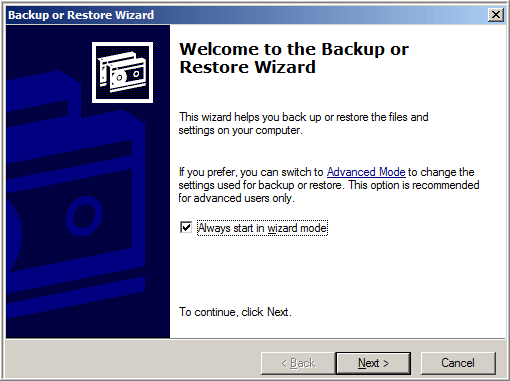
should see the Welcome to the Backup or Restore Wizard dialog
box that looks similar to the following:

- Click Next.
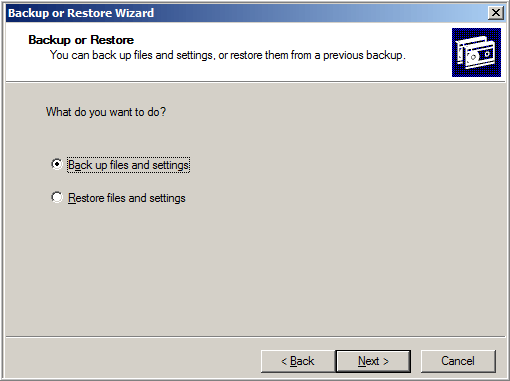
You should see the Backup or Restore dialog box
that looks similar to the following:

- Click
the radio button in front of the Back up files and settings option.
- Click Next.
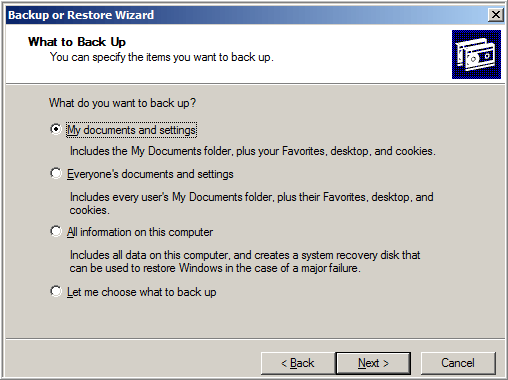
You should see the What to Back Up dialog box that
looks similar to the following:

At
this point, you have a number of options about the data you want
to back up. In most cases, you want to back up at least some of the
data in your My
Documents folder.
- Click
the radio button in front of the My documents and settings option.
- Click Next.
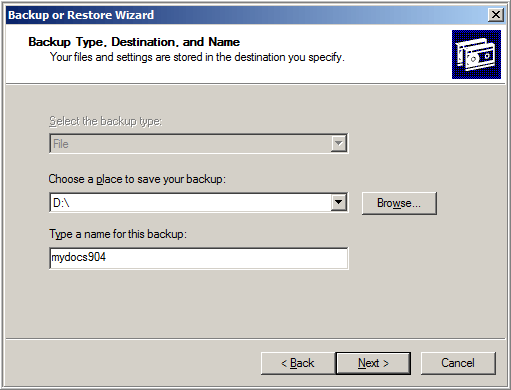
You should see the Backup Type, Destination, and Name dialog
box that looks similar to the following:

You
can now specify the location to which you will
back up the data.
- Use
the drop-down arrow below the Choose a place to save your
backup field to select the location to which you
will back up the data. For example, in the dialog box above, the
individual is going to back up her data to a CD-RW disc in drive
D: on her computer (i.e., D:\).
NOTE
If your computer has a Zip drive, and you don't need to back up more than
250MB of data, you can back
up your data to a Zip disk if you prefer.
- Under
the Type a name for this backup field, type a name
for the backup data file.
You
may already have a naming scheme for backups (e.g., mydocs904, as
shown in the dialog box above, indicating a back up of the My
Documents folder created in September 2004). If you do not
already have a naming scheme, create one that clearly defines what
the data is and when it was backed up.
- Click Next.
You should see the Completing the Backup or Restore Wizard dialog
box. Examine
the information in this dialog box. If it is correct, click Finish.
Your data will be backed up to the location you selected
using the file name you created.
NOTE
If the information in this dialog box is not correct, click Back to
change the option(s) you want to correct.
|