| How to Back Up Data from Hard Drive(s) to External Media |
|
| Back
Up Data to a CD
How to Format a CD Using Roxio Easy CD Creator How to Back Up Data to a CD Using Roxio Easy CD Creator How to Back Up Data to a CD Using the Windows Backup Utility How to Back Up Data to a CD Using Windows XP How to Back Up Data on a Windows Vista Computer Back Up Data to a USB Flash Drive How to Back Up Data to a USB Flash Drive Back Up Data to a Zip Disk How to Back Up Data to a Zip Disk Using the "Drag-n-Drop" Method How to Back Up Data to a Zip Disk Using the Windows Backup Utility |
How
to Back Up Data to a CD Using Roxio Easy CD Creator
|
|
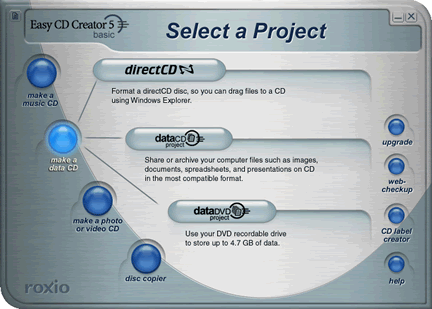
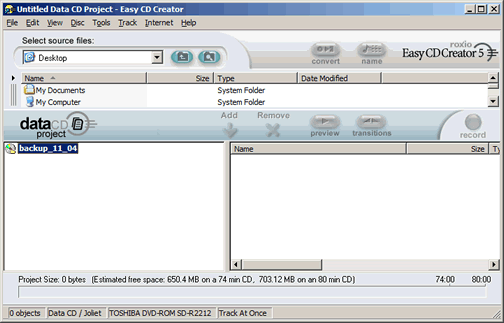
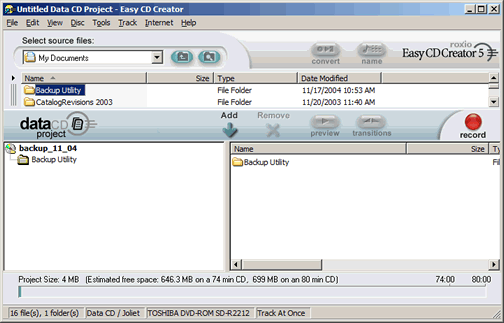
If your computer came with, as most new computers do, an application that allows you create data or audio CDs (e.g., Roxio Easy CD Creator), you can use that application to back up data from your hard drive. If your computer did not come with this type of application, you can purchase one. The instructions given here are for Roxio Easy CD Creator version 5 used on a Windows XP computer. If you have a different version of this application or a different application, the instructions will not work exactly as they are outlined here. Read the Help menu within your application for specific instructions. NOTE How to use Roxio Easy CD Creator to Back Up Data to a CD
|
|