Synching a local site to a remote site with Dreamweaver (Mac)
These instructions will show you how to sync a local site with a remote server using Dreamweaver on a Macintosh computer. Many of the steps and names can be replaced with your unique information.
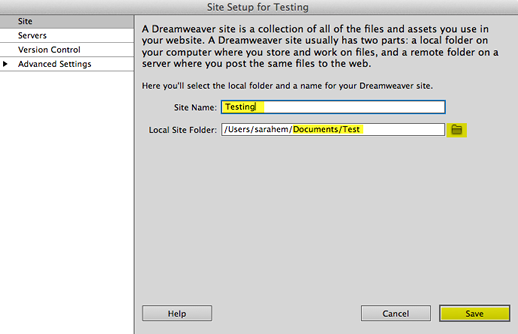
- Create a new local folder under Documents and rename it "Test_Name" or any name you would like (e.g. Website, Test, Unnamed Site, John_Smith, etc.) on your computer For the purposes of this document I named the folder "Test."
- Open Dreamweaver. Click Site on the menu bar. From the drop-down menu. Choose New Site. You wil see Site Setup for Testing.
- Type Testing in the Site Name field.
- Click the folder icon Local Site Folder and choose the folder you created in step 1.
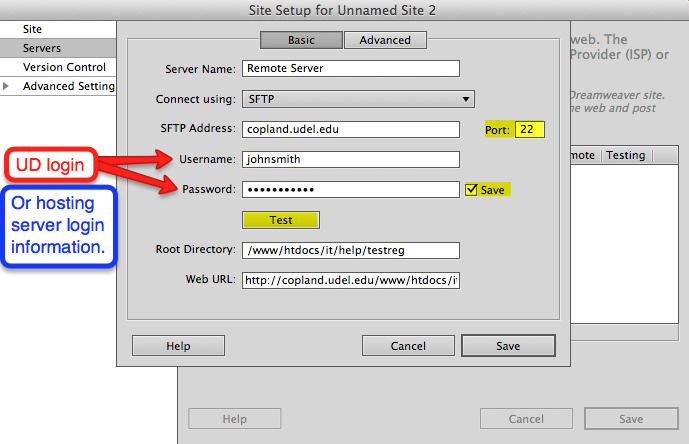
- Click Servers and click on the
 to add a new server.

- Type the information as follows in the new dialogue box:
Server Name: Remote Server
Connect using: SFTP
SFTP Address: copland.udel.edu Port: 22
Username: your username (e.g. UDelNet ID)
Password: your password (e.g. UDelNet password)
Root Directory: /www/htdocs/it/help/testreg
Web URL: http://www.udel.edu/www/htdocs/it/help/testreg
- Click Test to test the server connection. If the connection is not successful, review the information you entered into the text fields.
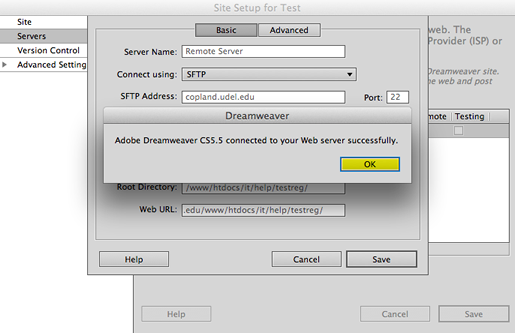
- Click Save, and Done for the last dialogue box.
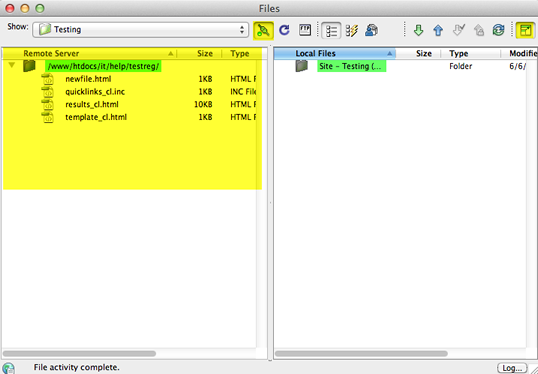
- In the Servers dialogue box, check Remote next to the name of the server.
- Click
 on the lower-right to show both local and remote sites.
 - Click
 in the Remote Servers dialogue box to connect to the remote host. A list of files should appear.
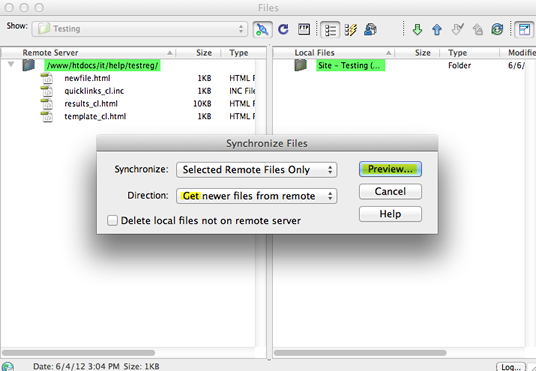
- Right-click the /www/htdocs/it/help/testreg/ folder and choose Synchronize. A new dialogue box will give you options for retrieving the files and should appear as follows. Before choosing Preview, be sure to choose Get newer files from remote.
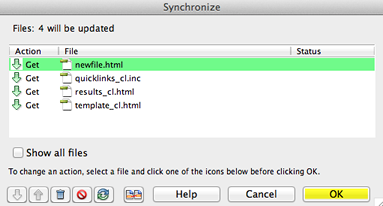
- Click OK after you have reviewed the Preview screen.
- The files should now be located under both, Local Files and Remote Server.
- Click to return your window and files to the normal view and then double-click newfile.html to open.
- Save As to create a new version of newfile.html with a new name.
- Name this new version name.html with any name (e.g. helpfile.html, testing12_johnsmith.html, etc.) and verify Test is highlighted before clicking Save.
- Close the newfile.html window.
- Edit the new HTML file, saving the file periodically.
- Save the finished file and choose to expand to show local and remote sites.
- Choose to connect to the remote host and then right-click the site folder under Local Files.
- Click Synchronize.
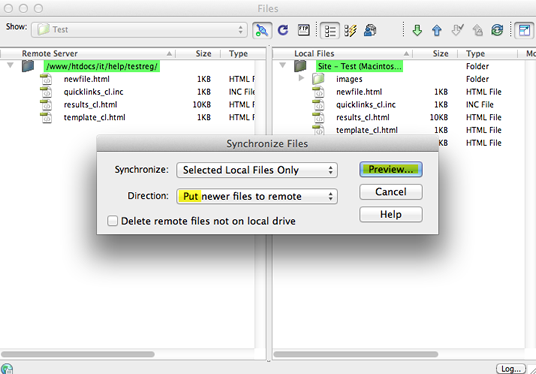
- Check to make sure that Selected Local Files Only and Put newer files to remote are chosen and click Preview.
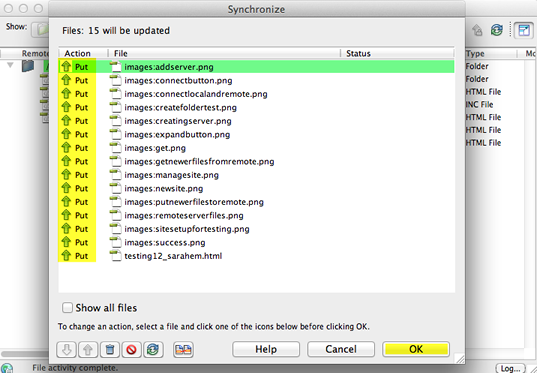
- Click OK when prompted.
Your local site has been successfully synched with a remote site.
If you have comments or suggestions about this Web page or see any errors, contact the IT Communication Group.