- Don't forget to plug one end of your 10-BaseT Ethernet cable into your computer's Ethernet adapter and the other end into one of the active Ethernet ports in your residence hall room or office.
- If you are a student returning to the residence halls with the same computer and Ethernet (network) adapter you used last year, your computer should be "Internet-ready" when you plug your Ethernet cable into your computer and wall jack.
- If you are using a new computer or an old computer with a new Ethernet adapter, plug your Ethernet cable into your computer and wall jack, then visit the University's Network Connection Web page (http://www.udel.edu/network) to register your computer for Internet access.
After you have plugged your computer's Ethernet cable into your computer's Ethernet adapter and into the network jack in your residence hall room or office, most Windows NT computers will automatically sense that you are connected to the Internet with an Ethernet adapter and will not require additional configuration.
These instructions are provided in the event that you should have to configure your Ethernet adapter manually. Read and review these directions before configuring your Ethernet adapter manually.
- If you are a faculty or staff member who needs to use the University's MVS system for administrative applications, contact the Technology Solutions Center (TSC) at 831-8895 or tsc-info@udel.edu. You can arrange either to bring in a blank CD-R to get a copy of the necessary software or to bring in your computer to have a staff member install the software.
- If you encounter any difficulties and are a student, contact the Residential Computing Consultants (831-8825). All University students, faculty and staff may contact the Technology Solutions Center (831-8895, tsc-info@udel.edu), or the IT Help Center (831-6000, consult@udel.edu) for assistance.
- Install your Ethernet adapter following the manufacturer's instructions. Be sure one end of your Ethernet cable is plugged into the adapter in the computer and the other end is plugged into the active Ethernet wall outlet.
- Install networking.
- From the Start Menu, choose Settings.
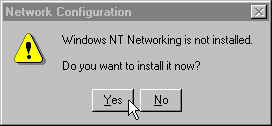
- Click Control Panel and double-click the Network Control Panel. The first time you click the Network Control Panel, you will be prompted to install networking:
- Click Yes to install NT Networking.
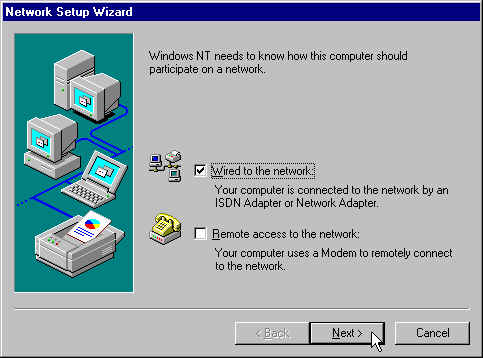
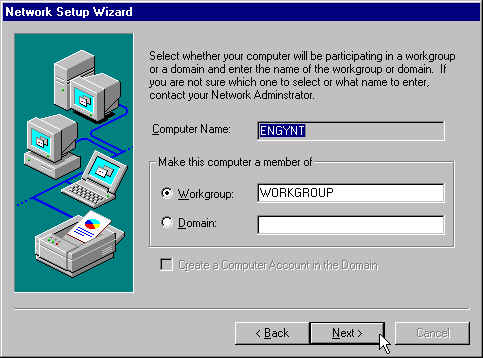
You will see the Network Setup Wizard window.
- Select Wired to the Network, then click Next > as in the screen below:
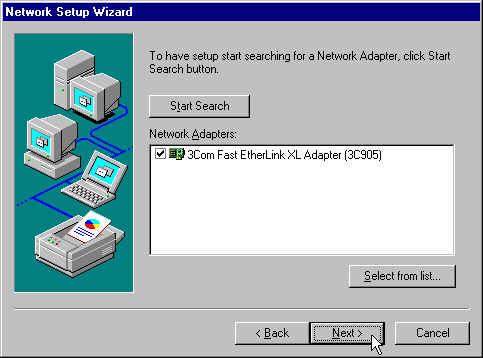
- At the next screen, click either the Start Search or Select from list button to install your Ethernet adapter drivers. You may need the disk supplied by the manufacturer of your Ethernet adapter.
- Select the TCP/IP protocol; then, click Next > as in the following screen:
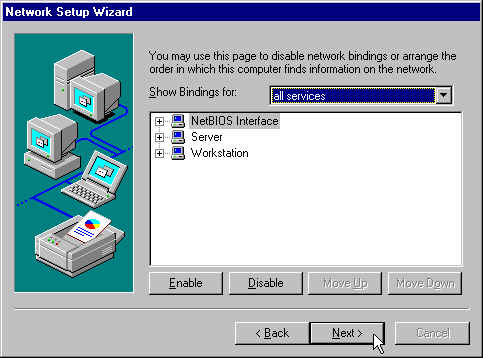
- You do not need to make any changes on the following screen. Click Next >:
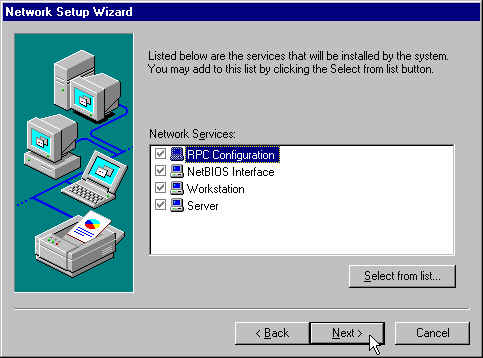
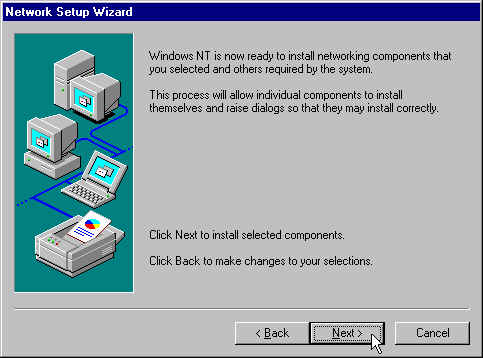
- Click Next > to install the selected components:
- Click Next >:
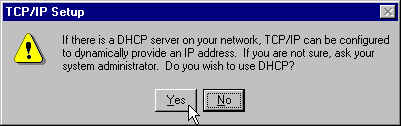
- Click Yes to use DHCP:
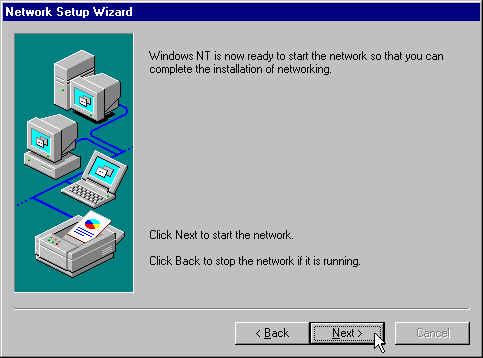
- Click Next > to start the network:
- Click Next > to accept the default settings:
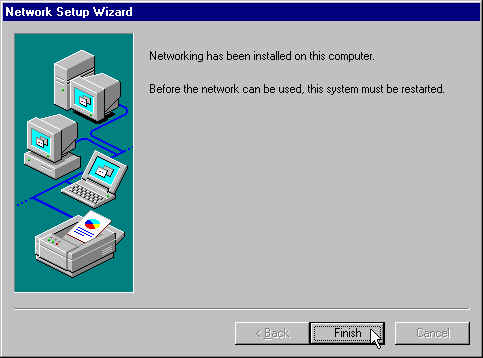
- Click Finish to complete the installation:
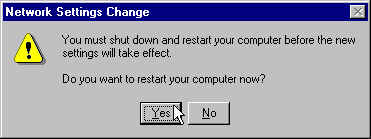
- Click Yes to restart your computer:
- Use the TCP/IP Connection
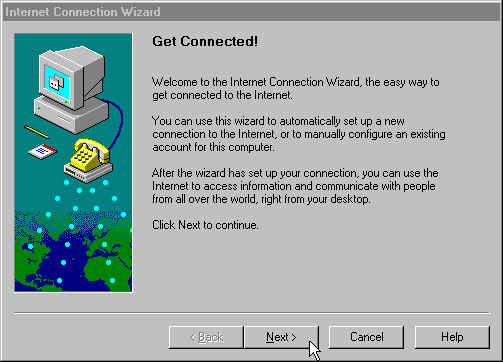
If you have installed Internet Explorer 4.0 or 5.0, when the computer restarts, you will be prompted to run the Internet Connection Wizard the first time you attempt to launch a TCP/IP application. Click Internet Explorer. When the Internet Connection Wizard screen appears,
- Click Next > to continue:
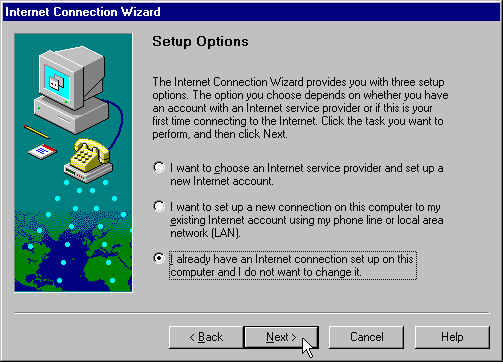
- On the next screen, select I already have an Internet Connection set up on this computer and do not want to change it. Then, click Next >:
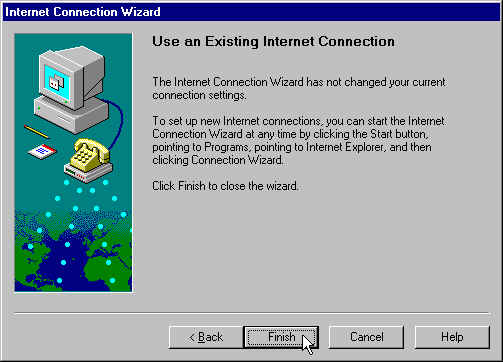
- Click Finish to continue:
You are now ready to use TCP/IP applications such as Netscape, Internet Explorer, Telnet and FTP.
Windows NT comes with a telnet vt100 terminal client built right in. To use telnet, from the Start menu, choose run and then type:
telnet coplandThis gives you a terminal window for Copland.
If you would like to set up a shortcut for Copland, follow these directions:
A new shortcut called Telnet Copland will appear on the desktop.
- Close all windows, then click with the right mouse button on the desktop (windows background).
- Select New, then Shortcut.
- Type
telnet coplandin the command-line box, then select Next.
- Type
Telnet Coplandin the Command Name box, then select Finish.
If you wish to make shortcuts to use Telnet to connect to another computer, follow the same procedure, substituting the proper computer name in steps 3 and 4 above.
Last updated July 13, 2004
Copyright © 2001 University of Delaware