Important Notes
- Don't forget to plug one end of your 10-BaseT Ethernet cable into your computer's Ethernet adapter and the other end into one of the active Ethernet ports in your residence hall room or office.
- If you are a student returning to the residence halls with the same computer and Ethernet (network) adapter you used last year, your computer should be "Internet-ready" when you plug your Ethernet cable into your computer and wall jack.
- If you are using a new computer or an old computer with a new Ethernet adapter, plug your Ethernet cable into your computer and wall jack, then visit the University's Network Connection Web page (http://www.udel.edu/network) to register your computer for Internet access.
After you have plugged your computer's Ethernet cable into your computer's Ethernet adapter and into the network jack in your residence hall room or office, most computers will automatically sense that you are connected to the Internet with an Ethernet adapter and will not require additional configuration.
- If you are a faculty or staff member who needs to use the University's MVS system for administrative applications, contact the Technology Solutions Center (TSC) at 831-8895 or tsc-info@udel.edu. You can arrange either to bring in a blank CD-R to get a copy of the necessary software or to bring in your computer to have a staff member install the software.
- If you encounter any difficulties and are a student, contact the Residential Computing Consultants (831-8825). All University students, faculty and staff may contact the Technology Solutions Center (831-8895, tsc-info@udel.edu), or the IT Help Center (831-6000, consult@udel.edu) for assistance.
Configuration Instructions
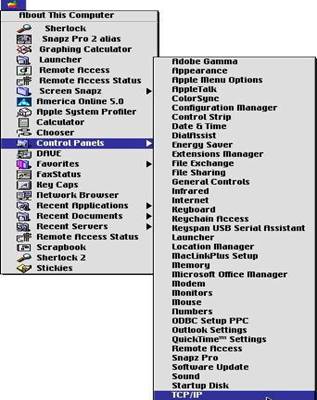
- From the Apple menu, select the TCP/IP control panel.
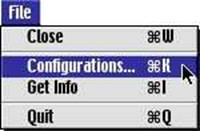
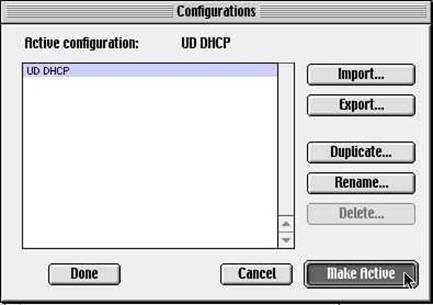
- From the File menu, select Configurations.
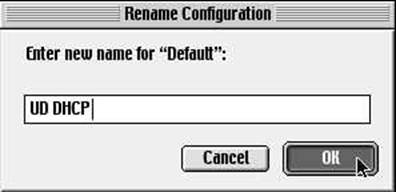
- In the Configurations window, click Rename.
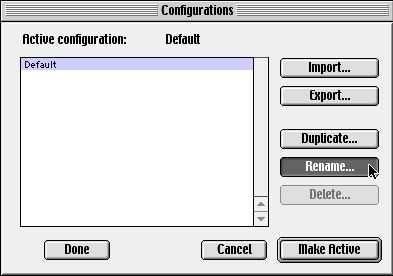
- In the Rename Configuration window, enter the name UD DHCP and click OK.
- In the Configurations window, click Make Active.
- Change the settings in the TCP/IP window's drop-down menus so that your computer's TCP/IP window looks like the one below. You'll need to type udel.edu in the Search domains box.
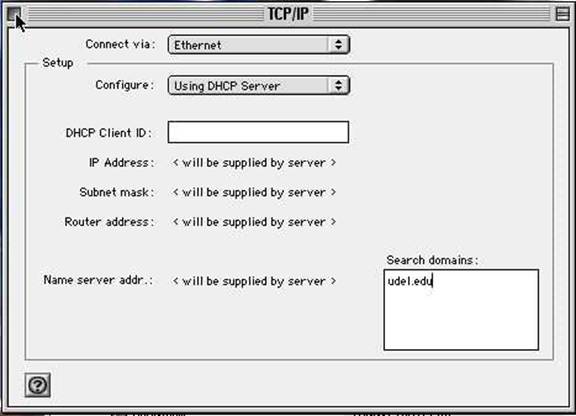
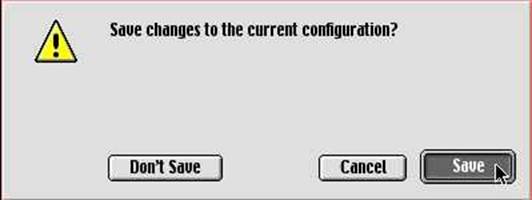
- Close the TCP/IP window and save the changes.
Your computer should now be connected to the University's computing network.
Last updated September 24, 2004
Copyright © 2001 University of Delaware