

- Don't forget to plug one end of your 10-BaseT Ethernet cable into your computer's Ethernet adapter and the other end into one of the active Ethernet ports in your residence hall room or office.
- If you are a student returning to the residence halls with the same computer and Ethernet (network) adapter you used last year, your computer should be "Internet-ready" when you plug your Ethernet cable into your computer and wall jack.
- If you are using a new computer or an old computer with a new Ethernet adapter, plug your Ethernet cable into your computer and wall jack, then visit the University's Network Connection Web page (http://www.udel.edu/network) to register your computer for Internet access.
After you have plugged your computer's Ethernet cable into your computer's Ethernet adapter and into the network jack in your residence hall room or office, most Windows 2000 computers will automatically sense that you are connected to the Internet with an Ethernet adapter and will not require additional configuration.
These instructions are provided in the event that you should have to configure your Ethernet adapter manually. Read and review these directions before configuring your Ethernet adapter manually.
- If you encounter any difficulties and are a student, contact the Residential Computing Consultants (831-8825). All University students, faculty and staff may contact the Technology Solutions Center (831-8895, tsc-info@udel.edu), or the IT Help Center (831-6000, consult@udel.edu) for assistance.
- Make sure your computer is turned off.
- Install the Ethernet adapter according to the manufacturer's directions.
- Make sure the Ethernet cable is plugged into the adapter.
- Turn on your computer (this should take you into Windows 2000).
- When the system reboots, you may see a message that the system detects an Ethernet adapter. You may be prompted to insert the driver diskettes for your Ethernet adapter.
- After starting up Windows 2000, click Connection Wizard on the Desktop or go to the Connection Wizard by following this menu path from the Start button:
Start -> Programs-> Accessories-> Communications-> Internet Connection Wizard- You will see a window like the one below. Select I want to set up my Internet connection manually.
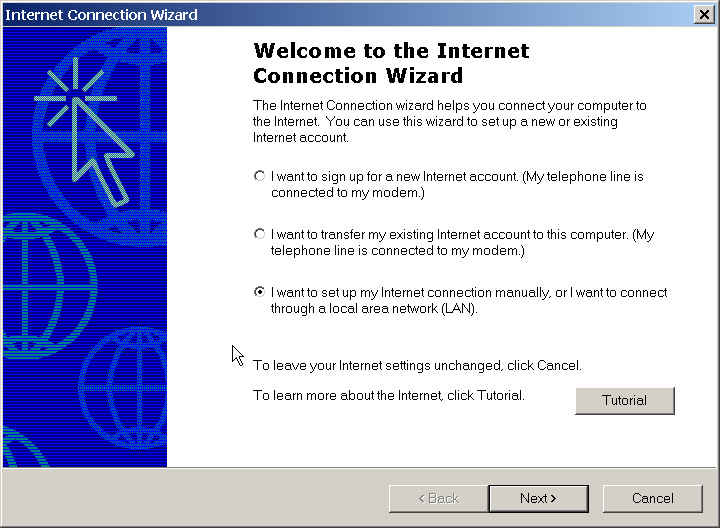
- Click Next.
- On the next screen, select I connect through a local area network (LAN).
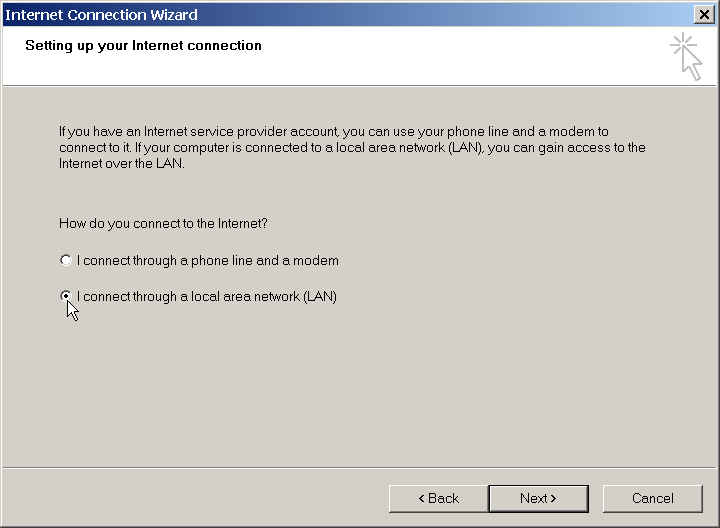
- Click Next.
- In the Local area network Internet configuration screen, select Automatic discovery of proxy server.
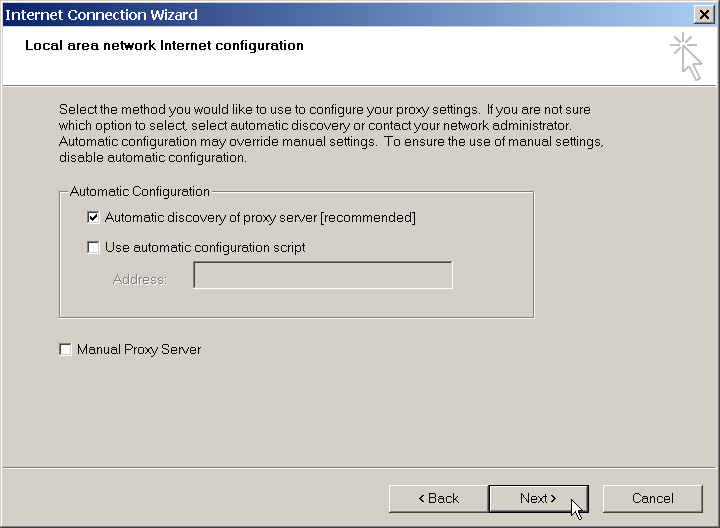
- Click Next.
- When asked if you "want to set up an Internet Mail Account now?", select No.
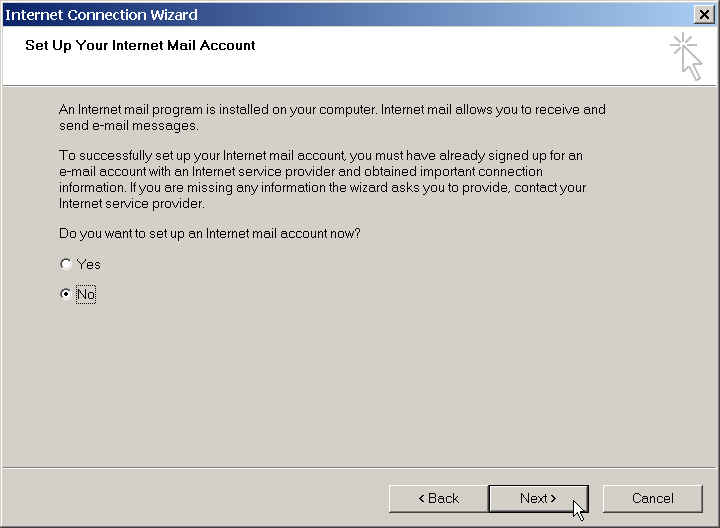
- Click Next.
- On the next screen, uncheck the box next to To connect to the Internet immediately....
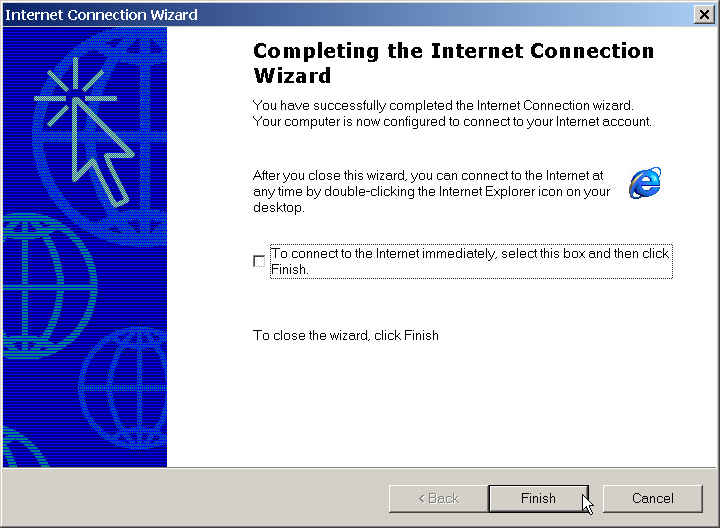
- After you have removed the check mark, click Finish.
Your computer should now be connected to the University's computing network.
Last updated July 13, 2004
Copyright © 2001 University of Delaware