 |
 |
|
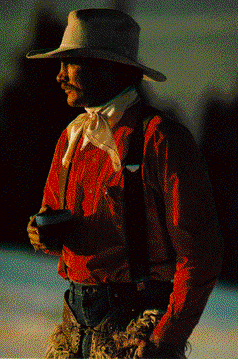
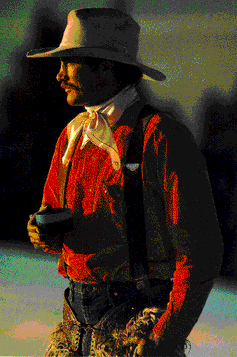
300/256
|
300/24
|
 |
 |
|
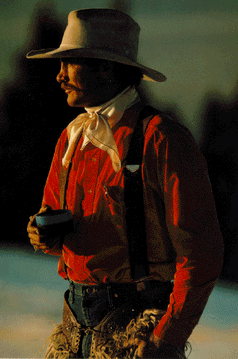
72/256
|
72/24
|
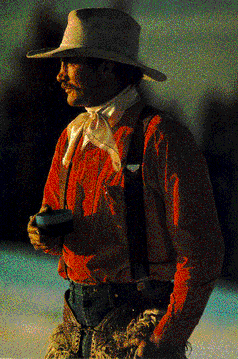
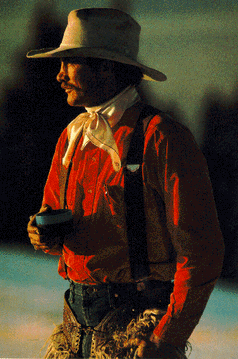
Here are some examples of scanning resolutions for you to compare. The file sizes range from 50 to 60K
|
|
|
|
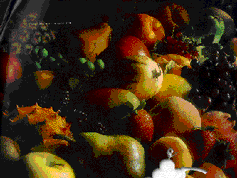
300/256
|
300/24
|
|
|
|
|
72/256
|
72/24
|
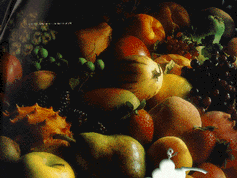
Here is the same 300/24 image using the system palette instead of the images palette (adaptive in Photoshop). Compare the two.
 |
|
|
(8 bit system 43k)
|
(8 bit Adaptive 60k)
|
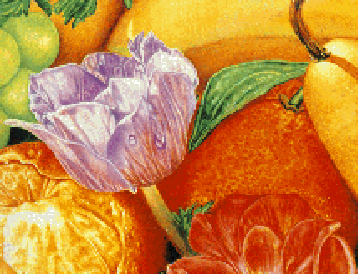
Below are examples of non-dithered and diffusion dithered images.
 |
 |
|
Non Dithered
|
Diffusion Dithered
|
Below you will find two images. One was scanned at 300 dpi, the other was scanned at 72 dpi, both were enlarged by two. You can see a breakdown of the image in the 72dpi enlargement. It is now 36 dpi, less than your screen's 72dpi resolution. The 300 dpi image, although enlarged, has no noticible breakdown because it is now 144 dpi and still higher than your screen display.
 300dpi enlarged
 72dpi enlarged
If the printed image is important to you, knowing the printer's dpi and line screen are important factors for image dpi. You would not see the additional dpi on screen, but it would be there when the printer needed it, creating the best possible printed image. In most cases, a 72 dpi image is adequate on a PostScript printer (as long as the image is not enlarged). It's not publishing quality, it's but good enough for class instruction and referencing.
We have found Photoshop and Debabelizer do this type of conversion very well.
Choosing Your Image
When choosing images for Internet presentation, choose images that have fewer color jumps. Images that contain every color in the universe are harder to drop down to 256 colors because many colors may be lost. If for example, you scan an image of a green forest, you may have very little breakdown during the indexing process. But, if you have many reds, yellows, whites an flesh tones, a noticeable breakdown will occur.
Images From Printed Sources
Images from printed sources (non-photo or hand drawn/painted) are created using what are called halftone screens. Many times when you scan this type of image, the halftone screens will be picked up by the scanner, creating a Moire pattern on your scanned image. How they appear will depend on two things: The quality of the original image (high quality book, magazine or newspaper) and the quality of your scanner.
Using an image with a Moire pattern will be very distracting to the viewer. In addition to that, when converting to a GIF, the Moire pattern will create a lot of noise and thus a messy image.
There is a very easy step in Photoshop that can remove (in most cases) the Moire pattern. See Photoshop Tutorial for the process.
Image Size (how much window space)
Almost everyone wants images in their web pages. Most people hate waiting for very large images to down load.
We have found that an image should be no larger than 487 pixels wide. This size seems to work well for all platforms. This will keep your viewers from having to scroll from window to window to view your image, and it saves on downloading time. This will also keep your image from being printed on mutiple pages if your viewers want to print your page for later reference.
Binary or Raw data : which format should you use, and when?
If the image is scanned, manipulated, and marked up/tested, and has been saved as a GIF, you are ready to upload your image files. "Raw Data" is the format you need to use.
If you are just using the scanners in a site to scan your images and want to use the campus network to download them to your personal computer for manipulation at a later date, then "Binary" is your format of choice.
| The Graphics Technology Cookbook text links |
||||||
| Digital cameras desktop video and sound |
Web pages | Class handouts and PDF instructions |
Images scanning and printing |
Slides and presentations |
Multimedia and Authoring |
NewMedia User Web Site |