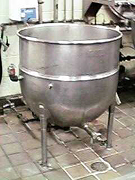
 Kettles are available in sizes from 10 to 150 gal for stationary types
and from 1 qt to 80 gal for tilt types. They may be table or floor-mounted
on legs, a pedestal or the wall and may be open or fitted with a hinged
cover and a mixing agitator.
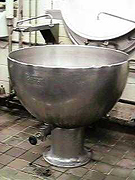 They are also known as steam-jacketed kettles because the "kettle"
consists of two bowl-like sections of welded stainless steel with air space
between for circulation of steam to heat the inner "bowl". The food does
not come in to contact with the steam. The steam supply can be direct-connected
or self-generated. Shallow kettles are always full-jacketed, while deep
kettles may be fully or two-thirds jacketed.
Features
 Kettles are available in sizes from 10 to 150 gal for stationary types
and from 1 qt to 80 gal for tilt types. They may be table or floor-mounted
on legs, a pedestal or the wall and may be open or fitted with a hinged
cover and a mixing agitator.
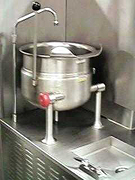 Sizes
of 12 gal or less are suitable for table mounting and vegetable cookery.
The two common methods of removing the food product are through a tangent
outlet (for straight-flow drain-off of liquids or thin mixtures) or by
tilting and pouring.
Deep kettles, especially tilting, are best for soups, gravies, sauces (e.g. spaghetti sauce), puddings and pie fillings as the quality of these food products is not adversely affected by the large mass and stirring. Pasta and beans and lentils can be cooked in deep kettles. Shallow kettles are suitable for braising meats, corned beef, and stews.
Safety Features
All kettles should have a steam outlet safety valve to release excess
steam and pressure gauge to monitor steam pressure. Controlling the degree
of tilt on tilt kettles and preventing splash of hot liquid in draining
stationary kettles are other safety considerations. Drain boxes are available
for controlling splash .
Cleaning (after each use)
A convenient water supply (i.e. swivel faucet beside the kettle) enhances
cleanability.
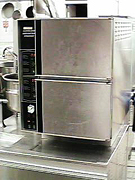 Food is cooked by direct contact with steam in the cooking chamber.
Steam enters the chamber or compartment at 5 to 8 pounds per square inch
(psi) or 15 psi (high pressure) and may be direct-connected or self-generated.
Some cookers use convection generators to produce steam without pressure
so that doors may be safely opened any time during cooking. The appropriate
steam temperature is 212 degrees F.
Features
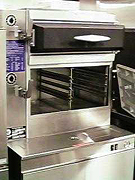 Cabinets are available with 1 to 4 compartments and adjustable shelves
(1 to 3 per compartment). High pressure steamers usually have a smaller
capacity of 1 to 2 counter pans as they cook the food faster. A drain in
the bottom of the compartment removes condensate. Preheating ensures shorter
cooking time, and some models have a thermostat that adjusts to size of
compartment load and original product temperature. Steamers are especially
good for dense root products such as potatoes and carrots as well as fragile
vegetables (broccoli and asparagus), rice, shrimp, and eggs in the shell.
Covering food increases the cooking time.
Safety features
Cabinets should have timers and automatic shut-off, and safety throttle
valve for each compartment so doors cannot be opened until steam pressure
is reduced. Heavy duty door gaskets prevent steam leaks. Four compartment
steamers usually have inconvenient top and bottom compartments. Pan sizes
should be suitable for workers to lift.
Cleaning (daily)
Features
The most common oven is the conventional roasting and baking oven which
may be single as in a range or stacked as two, three or four decks high.
Deck ovens save space, but it is best to limit stacking to two ovens. Two
decks will not be too high or too low and thus decrease the risk for burned
arms. Common products prepared in ovens are bacon, sausage, fish, oven-fried
or roasted chicken; roasted turkey, beef, pork; casseroles, macaroni &
cheese; baked and scalloped potatoes, winter squash; meringues, pies, cakes,
cookies, breads and rolls, bread pudding and custard.
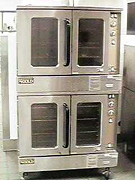 In convection ovens time and temperature must be adjusted to achieve
a quality product. Generally, lower temperatures (25 degrees F to 75 degrees
F lower) and shorter times (1/3 to 3/4 of conventional oven time) are used.
Overloading is the biggest problem in convection ovens.
There are also several types of combination ovens:
Safety Features
Ovens should have tables or racks in front for ease of loading and
unloading. Door handle should be of a material that absorbs little heat
and be offset far enough from the door to keep it below the burn temperature
of 125 degrees F.
In convection ovens the fan should automatically stop whenever the oven door is opened.
Cleaning (daily/weekly)
Conventional (stack or range)
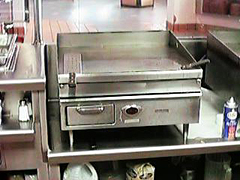 A
flat metal plate, made of iron, steel or aluminum, transfers heat to food
for cooking. Fat may or may not be added. Heat transfer occurs by convection
and conduction. Much of the heat generated is wasted i.e. absorbed by the
plate and never used or lost where surface is empty of food.
Features
A chromium steel surface makes the steel surface less porous; this
decreases cooking time, allows easy release of product and easy cleaning.
Carmelization on the surface occurs with a steel plate which interferes
with heat transfer and makes cleaning more difficult.
Shallow grease gutters or deep troughs may be located on the front and/or back and/or sides and drain into removable grease receptacles and collect food debris. Some griddles have a fence on two or three sides so more griddle surface is used for cooking and to act as a spatter guard.
Typical foods prepared using a griddle are: breakfast items - bacon, fried & scrambled eggs, French toast, pancakes, sausage patties & links, potatoes; lunch items - minute steaks, hamburger, cheese sandwich, frankfurters.
Tempering is the filling of the griddle plate pores with grease. The griddle surface is heated to 400 degrees F and the coated with cooking oil. After baking for 5 minutes, this oil residue is wiped off. Teflon and chromium surface griddles do not have to be tempered.
Cleaning (daily)
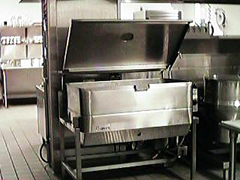 Fry
pans or skillets or braising pans may be table or floor models and come
with a cover which may have a small condensate cover or vent. Most top-of-stove
cooking is eliminated because it can function as a griddle, kettle, steamer,
oven, food-warmer as well as fry pan. It is ideal for cooking products
such as vegetables that might be crushed in a steam jacketted kettle.
Safety
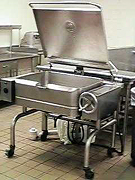 The hinged cover should be counterbalanced by springs so that it does not
slam down on a worker's hand. The cover handle should be located so that
the worker can lift the cover without being in the path of escaping steam.
Cleaning (after each use)
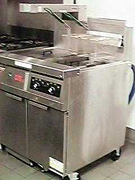 Conventional, pressure and convection fryers cook food by immersion in
heated fat, controlled by a thermostat. Frying times and temperatures varying
with the food material and make and size of fryer. Instant recovery fryers
tend to cook foods at lower temperatures (25 degrees lower, i.e. range
of 325 and 350 degrees F) and in a shorter time than conventional fryers.
Foods commonly prepared in deep fat fryers are: potatoes, breaded onion rings, shrimp, fish, chicken & cheese; breaded cauliflower, okra, & zucchini;
Safety
The control and display system must be easy to see and adjust. If the
fryer bursts into flames, workers should have access to a switch for the
fryer heat source for easy shut-off without risk.
A siphon or mechanical pump filtering device make fat handling easier than pouring. Fat temperature must be below 200 deg F (93 deg C) during cleaning. Arm, face and eye protection are also important during cooking.
Cleaning
(while in use)
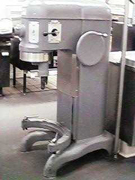 Although many variations exist (such as the mixer steam jacketed kettle,
mixer pressure cooker and vertical cutter-mixer), the overhead motor vertical
mixer is the most common type used in foodservice operations.
Features
Many sizes are available (5 -140 qt with most common being 20, 30,
40, 60 and 80 qt); up to 20 qt models are for use on tables or counters
and larger mixers are set on the floor.
Two feet on the table or floor support the vertical shaft which in turn supports the housing of the motor, gearing and rotating mechanism. Attached to the shaft is a sliding yolk which holds the mixing bowl over the feet. A lever, wheel or motor raises (and lowers)the yolk and the mixing bowl around the mixing beater. Large and heavy mixing bowls are lowered on to a special wheeled dolly or cart.
Usually there are 3 or 4 speed levels, and the action of the agitator and beater are designed for thorough blending and mixing.
Bowls are of tinned steel or stainless steel with stainless steel being recommended durability. Supporting elements are cast iron or steel and finished in aluminum or stainless steel.
Safety Features
A safety ring or bowl guard on some models prevents operation unless
the ring or guard is locked in place. Machine must be slowed or stopped
when changing speeds and completely stopped when scraping down sides of
bowl, lowering bowl or removing beater.
Cleaning
(after each use)
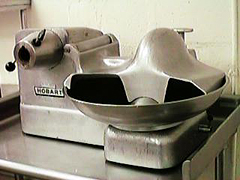 Although
mixers have accessories for chopping, slicing and shredding, many operations
use specialized pieces of equipment for these processes in various work
areas. Among these is the vegetable chopper/cutter which can be used for
chopping celery, onions, carrots, peppers; making small amounts of bread
crumbs.
Features
Most cutters are bench or table models or may be mounted on portable
stands. They are made of noncorrosive metals with encased motors and removable
parts for cleaning. In the vegetable chopper, food is usually placed in
a bowl which rotates or may be fed through an angled trough.
Safety Features
Blades should have protectors. Also, chopping should only occur when
all parts are securely fastened e.g. safety lock for bowl cover.
Cleaning