How to Create an Alternate Incoming Mailbox
Thunderbird 3.0.4
New install (no previous version of Thunderbird)
If you don’t have Thunderbird version 3, follow the instructions to download and install it at:
Start the Thunderbird application as you normally would.
If the Mail Account Setup wizard doesn’t automatically open, go to the Tools menu, select Account Settings
When the Mail Account Setup wizard opens:
1. In the Your Name text field, type the name of the department using the mail-alias (in this example, Office of the Registrar)
2. In the Email Address text field, type the e-mail address that clients use to send mail to this alias. Use the following form: mail-alias@udel.edu (in this example, abcd-req@udel.edu)
3. Do not type a password.
4. Click the Continue button
Thunderbird 3 will try to auto detect the settings for this account. Wait for the auto detection to complete. Then click the Edit button.
1. Change the Username to your UdelNetID (the part of your email address before the @udel.edu - in this example, maryqq)
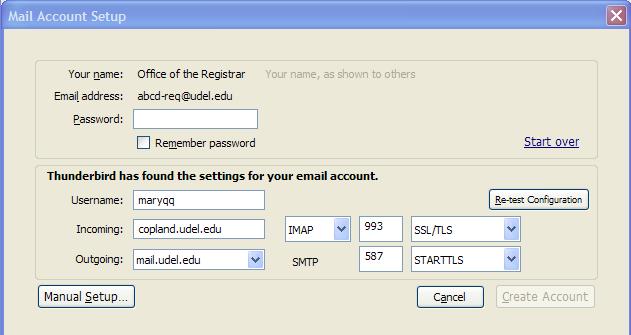
2. Change the Incoming field to copland.udel.edu
3. Change the Outgoing field to mail.udel.edu Change the SMTP security to STARTTLS
4. Click the Re-test Configuration button
When the auto detection completes, you should see two green buttons indicating a successful setup.
Modify the Settings
Incoming Server Settings
1. Click the Manual Setup button
2. Under the alternate incoming email address in the left panel, click Server Settings. If you don’t see Server Settings listed under the account, click the plus sign to the left of the alternate incoming email address.
3. In the When I delete a message section, choose Just mark it as deleted radio button
4. Check the Clean up (“Expunge”) Inbox on Exit and Empty Trash on Exit checkboxes
Note: Steps 3 and 4 indicate UD recommended settings. You may change them according to your own deletion preferences.
Advanced Server
Preferences
1. Click the Advanced button
2. In the IMAP server directory field, type: mail/
3. Click the OK button
4. Uncheck the Show only subscribed folders check box
Outgoing Mail Server
Settings
1. On the left panel, click Outgoing Server (SMTP)
2. If there is one is more than one outgoing mail server that has mail.udel.edu as part of the name, select it, and click the Remove button. Note: You cannot delete the default outgoing mail server. You can use the Set Default button to reset your default server.
3. Select the mail.udel.edu Outgoing mail server (this may be prefaced with UdelNetID). Click the Edit button
4. Uncheck the Use name and password box
5. Verify the Connection security is set to STARTTLS, and the Port is 587
6. Click the OK button
7. Click the OK button again
8. If you have more than one mail.udel.edu listed as the outgoing mail server, click on one of them to remove. One of your outgoing mail servers will be set as default. You cannot remove this.
Verifying your alternate incoming mailbox account
settings:
If you upgraded from Thunderbird version 2, you may need to change your alternate incoming mailbox settings to will work. You should also follow these instructions if you have tried to add the account, but it’s not working.
With Thunderbird open, go to the Tools menu, select Account
Settings
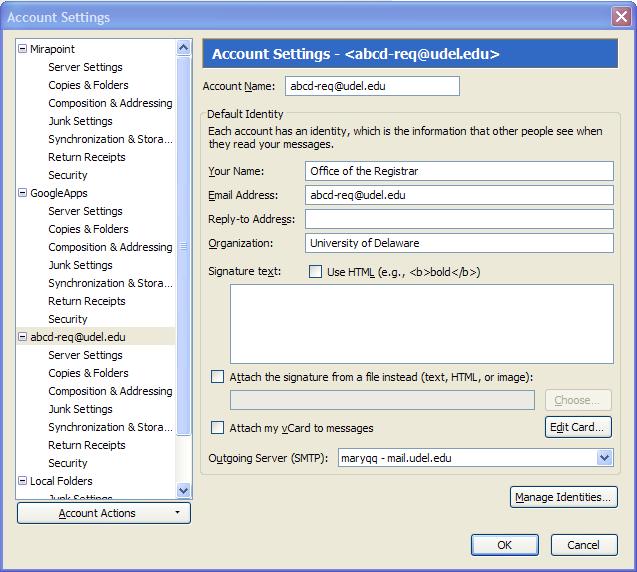
Verify General
Settings
1. In the left panel, click the email address of your alternate incoming mailbox
2. The Your Name field should be set to the Department name
3. The Email Address field should be the email address of your alternate incoming mailbox
4. Note: the Organization name is optional
Your screen should look similar to the following:
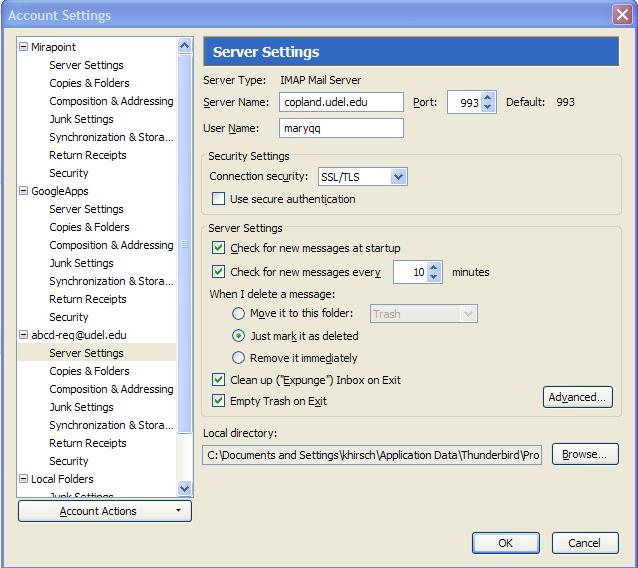
Verify Incoming Mail
Server Settings
1. In the left panel, click Server Settings
2. The Server Type: should be set to IMAP Mail Server
3. The Server Name should be copland.udel.edu
4. The Port should be set to 993
5. The
User name should be your UDelNet ID
6. The
Connection security should be set to SSL/TLS
7. The Use secure authentication checkbox should be Clear
8. The deletion preferences may be changed to fit your needs, but UD recommends:
a. When I delete a message, the Just mark it as deleted radio button is selected
b. Check the Clean up (“Expunge”) Inbox on Exit and Empty Trash on Exit checkboxes.
Your screen should look similar to the following:
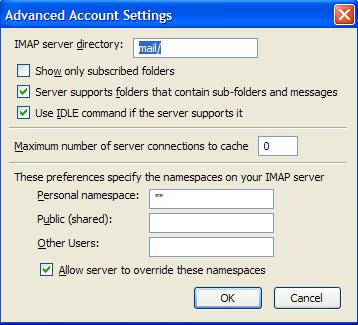
Verify Advanced
Incoming Server Preferences
1. Click the Advanced button
2. The IMAP server directory should be mail/
3. The Show only subscribed folders should be the only clear checkbox
4. Your screen should look similar to the following:
Verify Outgoing mail
server settings
1. From the left panel, select Outgoing Server (SMTP)
2. From the window on the right, select the outgoing mail server, and click the Edit button
3. The
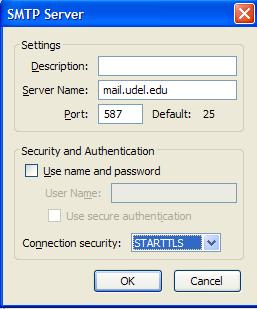
Server Name should be mail.udel.edu
4. The Port should be 587
5. The Use name and password and Use secure authentication checkboxes should be clear
6. Connection security should be set to STARTTLS
7. Click the OK button
8. Click OK
Your outgoing mail server settings should be set as follows:
Accessing your alternate incoming mailbox
When you first log in, you will be prompted to add a Security Exception
When prompted, check the box that says permanently store this exception
Click the Confirm Security Exception button.