Syllabus
Getting Started with Podcasting:
Microsoft Photo Story 3
Instructor: Paul Hyde
Planning guidelines
- Consider your content first. Scripting is essential for most podcasts. Podcasts with short, focused messages are most common, although some exceed 60 minutes.
- Example (2:45): Mandocasts: "Meta-Mandocast" about Fair Use Exceptions to the Copyright Law
- Example (2:17): Henry VIII and His Six Wives
- Identify the media elements you want to include, such as narration, images, titles, and soundtrack.
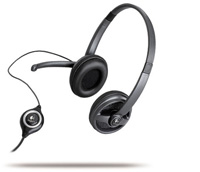
- Create a high quality audio recording. The Student Multimedia Design Center provides studios and equipment kits. This session will use the Logitech 350 headset, pictured at left.
- Use software that can assemble all of your media elements and package them in podcast format. This session will use Microsoft Photo Story 3 (available free from Microsoft).
- Consider how you will transfer your podcast project files and where you will publish the finished podcast. Putting Podcasts Online is recommended as a follow-up session.
- Choose one platform (Windows or Mac) at the outset and stick with it for an entire podcast production. Windows is the selected platform for this session.
- Read more about multimedia planning guidelines.
Advantages, disadvantages, and variations of the podcast format
- Advantages
- A low-threshold form of multimedia content creation and delivery.
- Gives the user a choice of when and where to listen.
- A method of "narrow-casting" to a selected subscriber base.
- Disadvantages
- Creating a good podcast takes time: make sure the effort is appropriate for your project.
- It can take extra effort to identify and capture an audience.
- Unlike a web page that a reader can visually scan, lengthy podcasts need to take other approaches to serve users.
- Can involve large files that lead to file storage and transfer issues.
- Variations
- Narration and soundtrack example: Wall Street Journal Tech News Briefing (RSS link)
- Narration, soundtrack, title, and images example: Enhanced Podcasting with Photo Story 3
- Podcasts that include video are another variation but are beyond the scope of this session.
Use the resource list for this session to find out more about podcasts.
How to combine images, titles, narration, and soundtrack to create a basic podcast
We'll use Microsoft Photo Story 3 to assemble this sample podcast. Photo Story presents a wizard to guide you step-by-step through project assembly.
- Select "Begin a new story" and click "Next."
- Select "Import pictures...", choose pictures, click "OK" and click "Next."
- Select the first picture and replace the text, "Type text to add a title on the first picture" and click "Next."
- Click the "Record Narration" button when you are ready to record.
- Click the "Stop Recording" button when you finish recording.
- Click the "Create Music..." button. Click "Play" to preview the music. Change options and click "Play" again to hear the effect of the new settings. When you're finished, click "OK" and click "Next."
- For podcasting, select "Save your story for playback on a Portable Media Center" and click "Next."
- To make future changes to your Photo Story project, be sure to click "Save Project."
Important: your Photo Story project file (with the .wp3 file extension) is not the same as your podcast output file (with the .wmv file extension). Keep track of both files!
Options for follow-up assistance
- Lynda.com and video101 offer excellent self-paced online tutorials.
- Come to the Student Multimedia Design Center service desk.
- Submit a question at AskSMDC.
- Make an appointment with our staff by calling 831-8832.
- For general technology questions, contact the Help Center.
- For help with a class presentation, contact the Oral Communications Fellows.
- For faculty who need help with technology, contact PRESENT.