This lab has two goals
I have set up a server for each of you that is typical of a commerical web hosting account. You'll have access to this server from now until the course ends.
This server gives you access to two technologies you don't have access to here on the UD campus: PHP and MySQL. These are server side technologies, used to build many commerical web sites, including Facebook.com, and many others.
You will compare and contrast what happens when we solve a problem using JavaScript, which works on the client side, vs. solving it with PHP, which works on the server side.
In this step, you'll access a personal web server, created just for you, with the hostname:
userid.cisc103.pconrad.info
You will need to substitute your userid in place of userid—for instance, if your userid is jsmithie, then your server is jsmithie.cisc103.pconrad.info
These servers are provided courtesy of HostMySite.com
These servers are not UD machines, but are instead set up courtesy of the friendly folks at a commerical hosting company called HostMySite.com. The CEO of HostMySite.com is an alumnus of UD—he graduated with a degree in Computer Science, after taking classes right here, maybe in this very room! Now, he runs a multi-million dollar hosting company, just down 896. He'll be coming to speak to our class on Tuesday, November 27th, so please plan to be in class on that day!
You will first access the password you need (which is stored in WebCT), and then you'll make sure you can log into the server's control panel.
Login to WebCT, and access the MyGrades screen. You will find a field called initWikiPw.
This field is your password to an account on a server that has the name:
userid.cisc103.pconrad.info
You will need to substitute your userid in place of userid—for instance, if your userid is jsmithie, then your server is jsmithie.cisc103.pconrad.info
Each of you has his/her own server, with its own hostname.
These servers are not UD machines, but are instead set up courtesy of the friendly folks at a commerical hosting company called HostMySite.com. The CEO of HostMySite.com is an alumnus of UD—he graduated with a degree in Computer Science, after taking classes right here, maybe in this very room! Now, he runs a multi-million dollar hosting company, just down 896. He'll be coming to speak to our class on Tuesday, November 27th, so please plan to be in class on that day!
Your userid.cisc103.pconrad.info server is typical of a commerical web hosting account.
One of the features of this web account is something called a control panel.
To log on to your control panel, enter the following web address:
http://userid.cisc103.pconrad.info/cpanel
Remember to substitute your userid in place of userid.
Notes:
https://userid.cisc103.pconrad.info:2083/
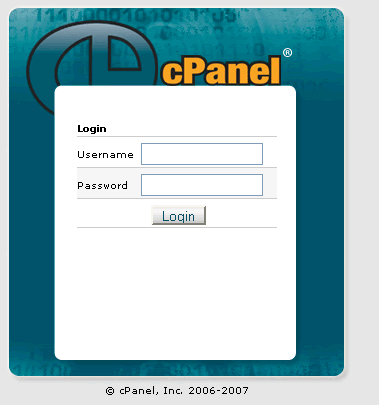
If so, that is perfectly normal.You should get a login prompt, something like this. If so, login with the following userid and password:

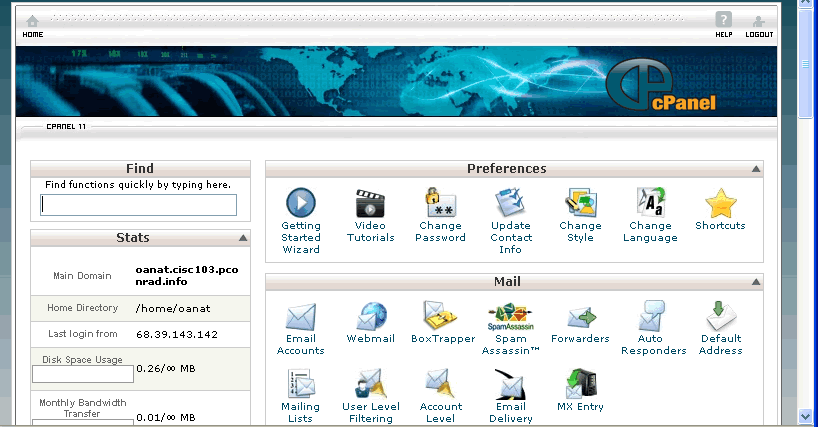
If you are successful, you should get a screen like the following one. There may be a "Getting Started Setup Wizard" showing. If so, cancel out of it—you do not need to go through those setups at this time.

For now, just click "Logout" at the upper right. We want to make sure that your account and password are working, and that you can access this screen later.
If you were not able to access this screen, please ask your TA during lab, or email your TA and your instructor ASAP.
Our next step will be to put the lab09 content up on your web server, under the address
http://userid.cisc103.pconrad.info/lab09
To do this:
Log into your server using SSH, in the same way we've been accessing copland.udel.edu all semester, except:
userid.cisc103.pconrad.infoOnce logged in, cd into the public_html subdirectory.
Once inside, use this comand to remotely copy all your files from your ~/public_html/cisc103/lab09 directory on copland to a lab09 directory under public_html on your new server. Substitute your userid in place of where it says "userid" below. Don't forget the dot at the end (you should know what that stands for by now, but if you don't ask your TA or instructor).
scp -r userid@copland.udel.edu:public_html/cisc103/lab09 .
After typing this command, try accessing these files at:
http://userid.cisc103.pconrad.info/lab09
You should see all your files there. If you don't, ask your TA and/or your instructor for help
There is nothing to turn in for this step—we'll just make sure that we can see your files online.
Just as we can write a JavaScript function to convert a temperature, we can also do the same in PHP. Here is how the function CtoF() would look in PHP:
<?php
// cToF.php    P.Conrad for CISC103, 11/15/2007

// Convert celsius to fahrenheit
//   Consumes: $cTemp, a number, representing a celsius temperature
//   Produces: a number, representing a fahrenheit temperature

function cToF($cTemp)
{
    return($cTemp * 1.8 + 32);
}

?>
We want to create this file on your new server. Unfortuantetly, emacs is not installed there. So, we will need to use Notepad and transfer the file using SSH Secure Shell File Transfer, or create the file on our copland account, and use an scp command like the one shown in step 2 to copy the file.
For now, I recommend the Notepad approach. So, do the following:
We won't be able to test this function until we've also completed step 4, but we can make sure it is readable by visiting:
http://userid.cisc103.pconrad.info/lab10/cToF.php
Once that link is readable and contains the lines shown above, proceed to the next step.
Check to the see that the link is readable. It is readable if you don't get an error message like "forbidden". But note: you will get a blank page. This is normal, because since PHP is a server side language, you will not be able to see the lines of code in the file.
When working with PHP, we typically will write a one web page that gathers the input to send it to the server, and another web page that calcuates and displays the response.
The request page will look very similar to the one we wrote in lab09, but it will be very much simplified. Here is the code for the request page. Store this in a file called convertCtoF.html, inside your lab10 directory on your new server.
<!DOCTYPE html
 PUBLIC "-//W3C//DTD XHTML 1.0 Strict//EN"
 "http://www.w3.org/TR/xhtml1/DTD/xhtml1-strict.dtd">
 <html xmlns="http://www.w3.org/1999/xhtml" xml:lang="en" lang="en">
 <head>
 <meta http-equiv="Content-Type" content="text/html; charset=iso-8859-1" />
 <title>Celsius To Fahrenheit (lab10)</title>
 </head>

 <body>
   <h1>Celsius to Fahrenheit</h1>
   <form action="celsiusToFahren.php">
     <p>Enter Celsius Temperature <input type="text" size="10" name="cTemp" id="cTemp" /></p>
     <p><input type="submit" value="Calculate" /></p>
   </form>
  <hr />
  <p><a href="http://validator.w3.org/check?uri=referer">validate</a></p>
 </body>
 </html>
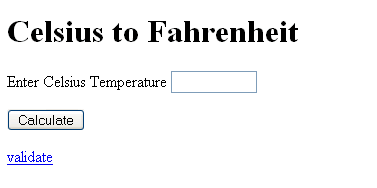
And the page will look like this:

Notice a few things:
form open tag has a value for the action attribute: <form action="celsiusToFahren.php">
celsiusToFahren.php in the same directory as the current HTML file.celsiusToFahren.php is the file we will write in the next step of this lab. Make sure that your page convertCtoF.html is accesible at the link http://userid.cisc103.pconrad.info/lab10/convertCtoF.html before proceeding.
The response page is the one that calcuates the response to our request. When you click the calculate button, and the action attribute on the form open tag is not empty, the form contents are sent to the server side, to the php script specfied in the action attribute.
So, we need to write a page called celsiusToFahren.php. Here's what that page will look like:
<?php
 require("cToF.php"); // read in the function definition for CtoF
 $cTemp = $_GET["cTemp"]; // get the celsius temperature out of the form
 $fTemp = cToF($cTemp); // calculate the fahrenheit temperature
?>
<!DOCTYPE html PUBLIC "-//W3C//DTD XHTML 1.0 Transitional//EN" "http://www.w3.org/TR/xhtml1/DTD/xhtml1-transitional.dtd">
 <html xmlns="http://www.w3.org/1999/xhtml">
 <head>
 <meta http-equiv="Content-Type" content="text/html; charset=iso-8859-1" />
 <title>Result of converting Celsius to Fahrenheit</title>
 </head>

 <body>
 <h1>Result of Converting Celsius to Fahrenheit</h1>
 <p>The celsius temperature <?php print $cTemp ?>
   corresponds to <?php print $fTemp ?> </p>

 <p>Calculate <a href="convertCtoF.html">again?</a></p>
 <hr />
 <p><a href="http://validator.w3.org/check?uri=referer">validate</a></p>
 </body>
</html>
Store this in a file called celsiusToFahren.php under your lab10 directory on your new server.
When it is complete, try testing by entering a value on the page
http://userid.cisc103.pconrad.info/lab10/convertCtoF.html
and pressing the button.
When it works, you are finished!
Please see the wiki page for lab10 for the detailed grading rubric.
| Submitted by | Penalty |
|---|---|
| Tue 11/27/2007, 11:55pm | None |
| Wed 11/28/2007, 11:55pm | 2% |
| Thu 11/29/2007, 11:55pm | 4% |
| Fri 11/30/2007, 11:55pm | 8% |
| Sat 12/01/2007, 11:55pm | 16% |
| Sun 12/02/2007, 11:55pm | 32% |
| Mon 12/03/2007, 11:55pm | 64% |
| After Mon 12/03/2007, 11:55pm | NO CREDIT NO EXCEPTIONS |
Copyright 2007, Phillip T. Conrad, CIS Dept., University of Delaware. Permission to copy for non-commercial, non-profit, educational purposes granted, provided appropriate credit is given; all other rights reserved